Why a Free-Standing Bar is the Perfect Addition to Your Space
Flexibility and Portability Over Built-Ins
The primary advantage of a free-standing bar is its inherent mobility. Unlike a built-in bar that becomes a permanent part of your home’s structure, a free-standing unit can be moved from the living room for a party to the patio for a summer gathering, or even relocated to a new home entirely. This flexibility allows you to adapt your space for different occasions and layouts.
The Ultimate Entertaining Hub for Any Room
A free-standing bar instantly creates a dedicated space for entertaining. It’s not just for holding drinks; it becomes a focal point that encourages social interaction. Whether you’re hosting a game night, a formal cocktail party, or just having friends over, it provides a functional and stylish station for serving guests.
Before You Begin: Your Pre-Assembly Checklist
Unboxing and Inventory: Verifying All Parts
Before you touch a single tool, lay out all the parts on a soft surface like a carpet or blanket to prevent scratches. Cross-reference every screw, cam lock, dowel, and panel with the parts list in the instruction manual. Organizing parts into small containers or cups by type will save you countless minutes of searching during assembly.
Essential Tools You’ll Need for the Job
While most bars come with an Allen key, using your own tools will make the job faster and easier. Here are the essentials:
- Power Drill with Hex Driver Attachments (for speed)
- Rubber Mallet (for gently tapping parts into place)
- Phillips Head Screwdriver
- Carpenter’s Square (to ensure perfect 90-degree angles)
- A level (for final placement)
Choosing the Perfect Location
Consider both aesthetics and function. Ensure there’s enough clearance for doors and drawers to open fully. Place it near an electrical outlet if you plan to add lighting or use appliances like a wine cooler. Also, think about traffic flow—you don’t want it blocking a main walkway.
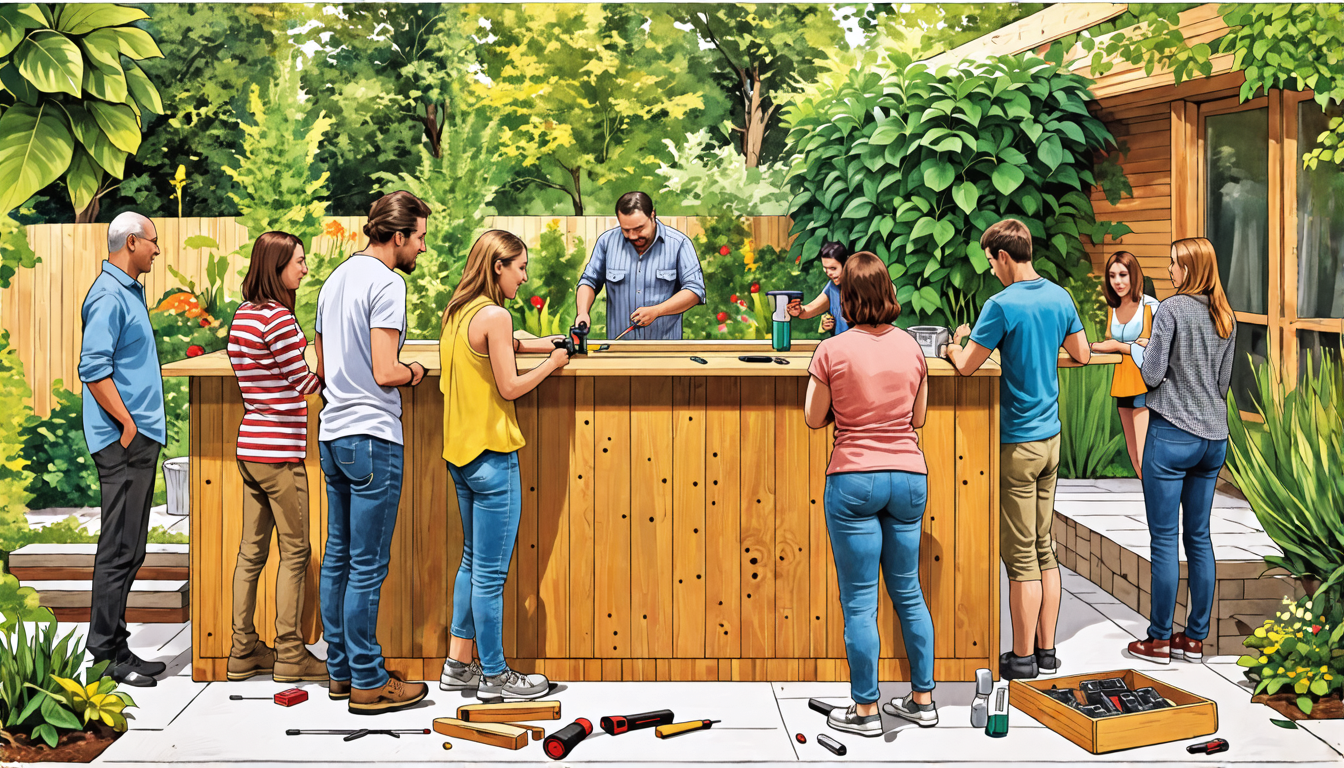
A Step-by-Step Guide to Assembling Free-Standing Bars
Step 1: Building the Main Frame and Structure
This is the skeleton of your bar. Start by connecting the side panels to the main base and top supports. Use your carpenter’s square to check that everything is perfectly aligned before you fully tighten all the cam locks and screws. A square frame here is critical for the stability of the entire unit.
Step 2: Attaching Shelves, Backsplash, and Countertop
Following the manual, install any interior shelves. The backsplash is typically one of the next major components. It often provides crucial rear support. Finally, carefully place the countertop onto the assembled frame, ensuring it is centered and secure.
Step 3: Installing Doors, Drawers, and Hardware
Assemble drawer boxes first, then attach the glides to the drawer and the interior of the bar. For doors, attach the hinges to the door first, then mount the door to the bar frame. Adjust the hinges as needed to ensure the doors are straight and close properly.
Step 4: Final Touches and Stability Check
Attach any final hardware like handles and knobs. Perform a thorough stability check by gently rocking the bar from different angles. If there’s any wobble, go back and ensure every single connection point is fully tightened.
Common Pain Points When Assembling Free-Standing Bars (And How to Solve Them)
“The Instructions Are Unclear or Missing Diagrams”
Solution: Don’t struggle in silence. Manufacturers often post PDF manuals online. A quick search of your bar’s model number can frequently yield official instructions, and more importantly, video assembly tutorials from other users who have already completed the process.
“Parts Don’t Seem to Fit Together Correctly”
Solution: If something doesn’t fit, never force it. Forcing parts can strip screws or split the particle board. Take a step back, put the parts down, and re-read the instructions for that step. Often, the issue is simply that a part is upside down or mirrored incorrectly.
“The Finished Bar Feels Wobbly or Unstable”
Solution: This is almost always due to the frame not being square during initial assembly. Ensure all cam locks are fully tightened (usually a quarter-turn past hand-tight) and use a carpenter’s square to check for frame alignment before final tightening.
“Struggling with Soft-Close Hinges or Drawer Glides”
Solution: This is a common hurdle. The key is modular assembly. Assemble the door/drawer box first, then attach the glides/hinges to the bar frame. Only then should you mount the door or slide the drawer into place. This gives you more room to work and see what you’re doing.
Free-Standing Bar vs. Built-In Bar: Which is Right for You?
Comparison: Cost, Installation Time, and Flexibility
| Factor | Free-Standing Bar | Built-In Bar |
|---|---|---|
| Cost | Generally lower cost for the unit itself. DIY assembly saves on labor. | Higher cost due to custom materials, carpentry, and potential plumbing/electrical work. |
| Installation Time | A few hours to an afternoon for assembly. | Can take several days to weeks, depending on complexity. |
| Flexibility | High. Can be moved or taken with you if you move. | Permanent. Zero flexibility once installed. |
| Skill Level | Beginner to Intermediate (following instructions). | Advanced (requires carpentry, finishing, and potentially trade skills). |
Making the Best Choice for Your Home and Skill Level
Choose a free-standing bar if you’re a renter, love to redecorate, are on a budget, or prefer a DIY project. Opt for a built-in if you’re doing a full-scale home renovation, want a completely custom look, and plan to stay in your home long-term.
Pro Tips for a Flawless Finish
The Secret to a Professional Look: Use Wood Glue
Unique Insight: While not included in the instructions, a small dab of wood glue in the dowel holes and on joint surfaces before screwing them together can drastically reduce squeaks and increase the long-term rigidity of your bar. Most people skip this, but it’s a game-changer for furniture that gets moved or bears the weight of heavy bottles and glassware. It essentially turns multiple pieces of board into a single, solid unit.
Protecting Your Floor and Your Bar
Attach felt pads to the bottom of every leg or base point to prevent scratches on your flooring. If your bar will be in a high-moisture area like a basement or patio, consider applying a clear sealant to the bottom edges of the particle board to prevent swelling from ambient humidity.
Personalization Ideas: Staining, Painting, and Adding Lighting
Many free-standing bars are made of unfinished or lightly finished wood, making them perfect for customization. You can stain, paint, or even add peel-and-stick wallpaper to the back panel. For a truly professional touch, install a battery-operated LED light strip under the top shelf to illuminate your glassware and bottles.
Frequently Asked Questions About Assembling Free-Standing Bars
How long does assembling free-standing bars typically take?
For an average-sized bar, plan for 2 to 4 hours. Complex models with multiple drawers, doors, and electrical components (like a built-in wine fridge) can take longer. Always give yourself more time than you think you’ll need to avoid rushing.
Can I assemble a free-standing bar by myself, or do I need a helper?
Many bars are designed for solo assembly. However, having a second person is highly recommended for steps involving lifting large panels (like the main frame or countertop) to ensure they don’t get damaged and to hold pieces steady while you fasten them.
What is the most common mistake people make when assembling free-standing bars?
The most common mistake is overtightening screws, especially in particle board. This can strip the pre-drilled holes, leading to a weak connection. Tighten until the screw is snug and the joint is firm, but stop before you feel excessive resistance.
My bar didn’t come with a wine glass rack. Can I add one later?
Absolutely. There are many aftermarket options, including hanging stemware racks that mount underneath a shelf, or freestanding countertop holders. This is a simple and effective way to enhance the functionality of your bar post-assembly.
How much weight can a typical free-standing bar hold?
Weight capacity varies significantly by model and construction. A well-assembled bar with a solid wood or thick particle board frame can typically hold several hundred pounds distributed across its shelves and countertop. However, always check the manufacturer’s specifications for the exact weight limit. Avoid placing extreme weight on unsupported sections of shelving.