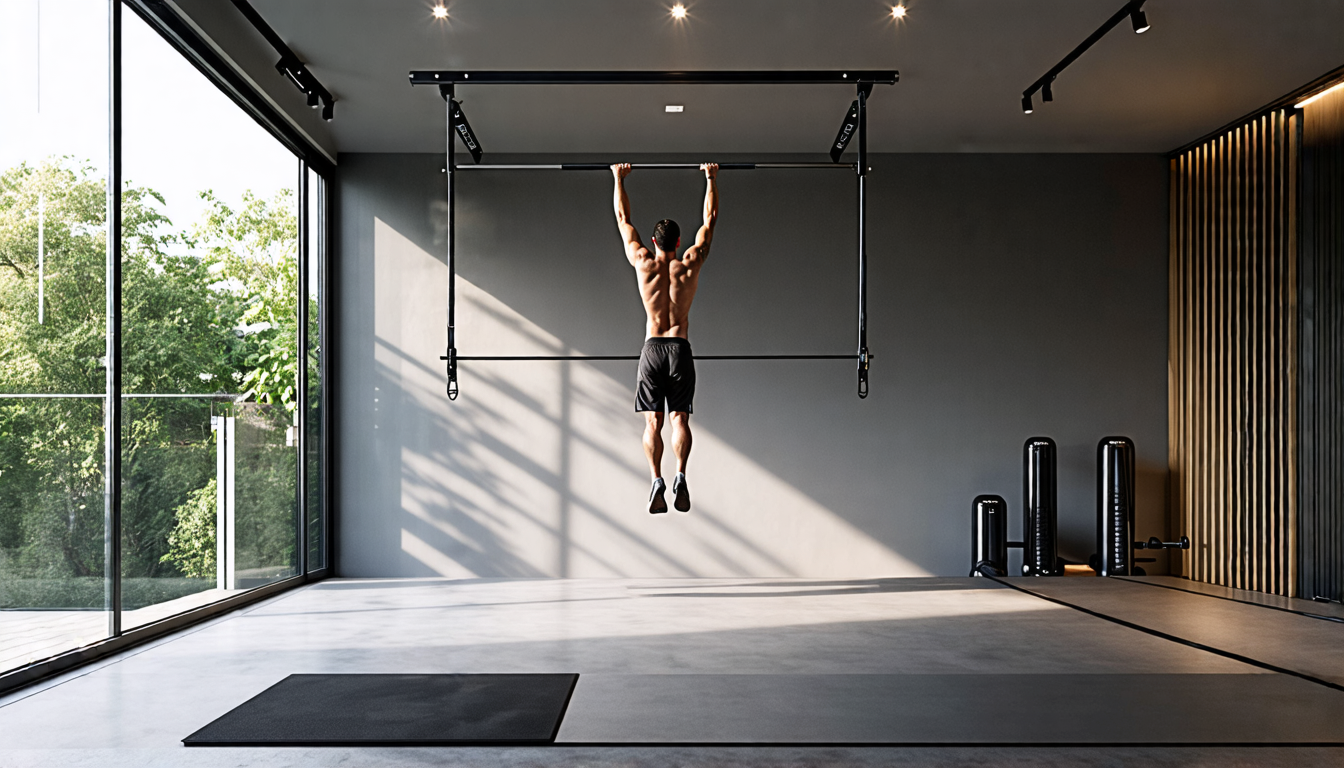
Ceiling-mounted pull-up bars are a fantastic addition to any home gym, offering a plethora of benefits that make them a standout fitness tool. Whether you are aiming to sculpt a chiseled upper body or simply need a space-saving exercise solution, a ceiling-mounted pull-up bar provides an optimal workout experience. Unlike traditional pull-up bars that take up precious floor space, these ceiling-mounted versions maximize your workout area, allowing you to perform a variety of exercises right at home. They facilitate a comprehensive upper body workout, targeting muscles in your back, arms, shoulders, and core, thus enhancing your overall strength and endurance.
Choosing the right ceiling-mounted pull-up bar can be a daunting task with so many options available. It’s essential to consider key features such as weight capacity, durability, and the type of grips it offers to ensure you get the best value for your investment. Once you’ve chosen the perfect pull-up bar, the installation process is equally crucial. A well-installed bar will not only guarantee your safety but also enhance the effectiveness of your workouts. By following a step-by-step installation guide, you can securely mount your pull-up bar, transforming any room into a functional fitness zone. With the right equipment and setup, you’ll be on your way to achieving your fitness goals without ever leaving the comfort of your home.
Benefits of Installing Ceiling-Mounted Pull-Up Bars
Ceiling-mounted pull-up bars have gained immense popularity among fitness enthusiasts for their ability to offer a highly effective workout that targets numerous muscle groups. This innovative piece of equipment can transform any room into a personal gym, providing a plethora of benefits that cater to both seasoned athletes and fitness beginners. Here, we delve into two primary benefits: achieving a comprehensive upper body workout and enjoying a space-saving exercise solution.
Comprehensive Upper Body Workout
One of the standout advantages of installing a ceiling-mounted pull-up bar is its capacity to deliver a comprehensive upper body workout. Activation of various muscle groups occurs through different pull-up variations, ensuring a balanced approach to strength training.
- Latissimus Dorsi: Commonly known as the lats, these large muscles in your back are heavily engaged during pull-ups, providing width and an impressive V-taper to your physique.
- Biceps and Forearms: Pull-ups work wonders for your biceps and forearms, enhancing your overall arm strength and grip endurance. This strengthens your pull and grasp in multiple athletic scenarios.
- Trapezius and Rhomboids: These muscles in the upper back help in elevating the scapulae and retracting the shoulder blades, fostering a more robust and resilient upper back.
- Deltoids: Performing pull-ups with various grips can also engage your deltoids, the muscles that shape your shoulders, contributing to a more defined and strong shoulder structure.
- Core Stability: Engaging your core to stabilize your body throughout the pull-up motion cannot be overlooked. This not only works your abs but also improves balance and coordination.
Moreover, the versatility of ceiling-mounted pull-up bars extends to various exercise modifications. Users can execute wide-grip pull-ups, chin-ups, and other techniques to continuously challenge their muscles and prevent workout monotony. By incorporating these exercises into your routine, you ensure consistent muscle engagement, leading to incremental strength and size gains over time. Plus, this type of workout enhances muscle endurance, making you more resilient to physical fatigue during prolonged activities.
Space-Saving Exercise Solution
Finding space for your fitness needs can often be a challenge, especially for those living in smaller apartments or homes. This is where ceiling-mounted pull-up bars truly shine by offering a space-saving exercise solution.
Unlike bulky fitness equipment that demands significant floor space, ceiling-mounted pull-up bars leverage unused vertical space, allowing you to maximize the usability of your room. The minimalist design means you can set up a powerful workout station without cluttering your living area. When mounted on the ceiling, the pull-up bars are neatly out of the way, making it easier to maintain an organized and functional living space.
This space efficiency does not come at the cost of versatility. Quite the opposite, a ceiling-mounted pull-up bar becomes a launchpad for numerous bodyweight exercises beyond the basic pull-up. Here are a few exercises you can perform:
- Hanging Leg Raises: Ideal for targeting the lower abs and hip flexors, hanging leg raises are a great addition to your abdominal routine.
- Muscle-Ups: This advanced exercise combines a pull-up with a dip, engaging both your upper body and core muscles for a comprehensive workout.
- Hanging Knee Tucks: Similar to leg raises but easier to start with, knee tucks effectively engage the midsection and provide a stepping stone to more complex movements.
- Toes to Bar: An excellent exercise for full-body coordination and strength, toes to bar targets your core while also taxing your grip and upper body muscles.
- Front Lever Holds: A static hold that significantly challenges your core, lats, and shoulders, perfect for those aiming to build dynamic strength and control.
By incorporating these varied exercises into your fitness regime, you can fully utilize the vertical dimension of your living space, facilitating a well-rounded approach to fitness in a confined area. This multifunctional capacity not only saves space but also adds value to your home gym setup by providing diverse workout options in one compact piece of equipment.
Additionally, ceiling-mounted pull-up bars create opportunities for convenient daily workouts. Given the accessibility and setup, you can easily integrate quick exercise sessions into your daily routine, whether it’s a morning muscle activation or a post-work stress buster. This convenience is particularly appealing for busy individuals who might find it difficult to allocate time for off-site gym visits. By having the equipment readily available at home, you’re more likely to maintain consistency in your workout regimen, fostering long-term fitness success.
Choosing and Installing the Right Ceiling-Mounted Pull-Up Bar
Key Features to Look For
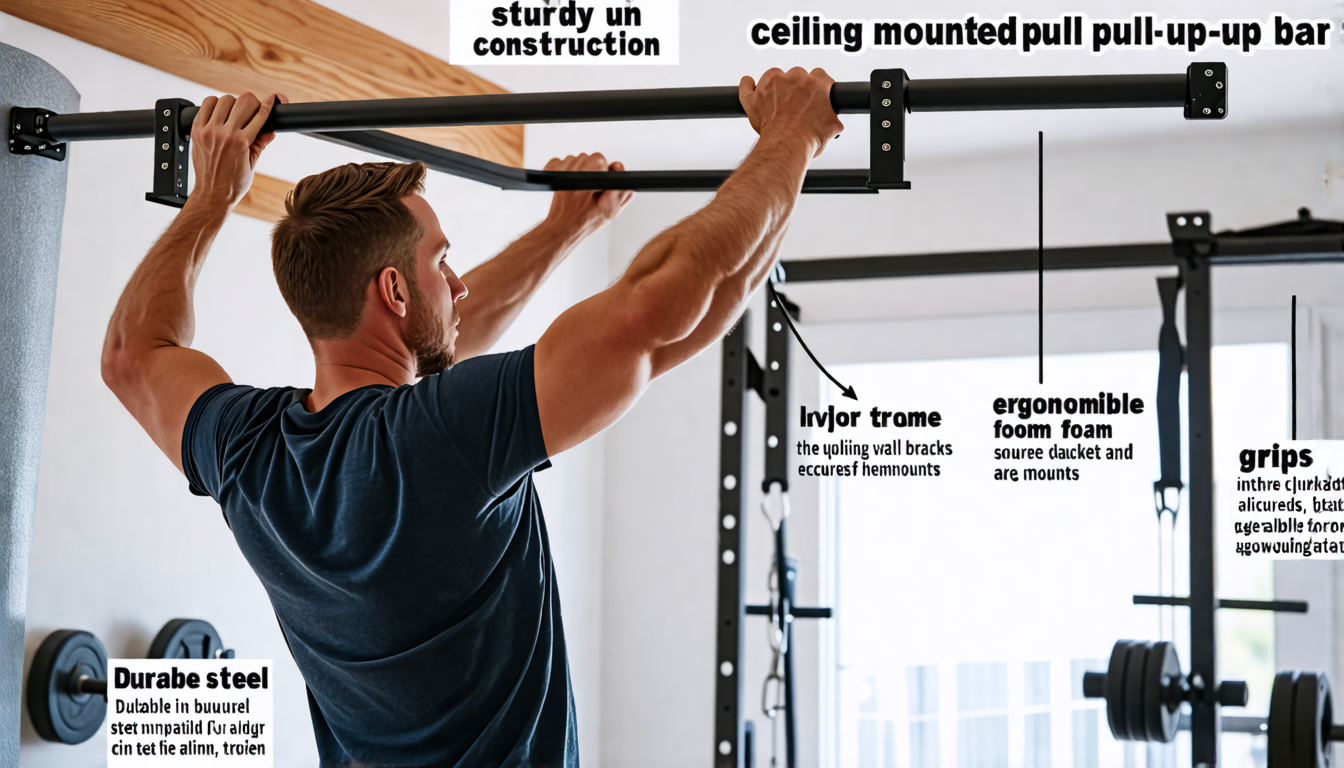
When selecting a ceiling-mounted pull-up bar, it’s essential to consider several key features to ensure you get a high-quality, durable, and effective piece of equipment. Here are some crucial aspects to look for:
1. Sturdy Construction: The pull-up bar should be made of high-quality materials such as heavy-duty steel to support your weight safely and withstand regular use. Look for bars with a powder-coated finish to prevent rust and corrosion.
2. Weight Capacity: Check the maximum weight capacity of the pull-up bar. It should be able to support at least 300 pounds to accommodate most users. Higher weight capacities are better as they provide added security and stability.
3. Grip Options: Varied grip positions, such as wide, narrow, and neutral, allow for a more versatile workout, targeting different muscle groups. Foam or rubber grips can provide comfort and prevent slipping during exercises.
4. Mounting Hardware: High-quality mounting hardware is crucial for safety and stability. Ensure that the pull-up bar comes with all necessary components, including screws, bolts, washers, and any additional support brackets required for installation.
5. Adjustability: Some ceiling-mounted pull-up bars offer adjustable widths or heights to accommodate different ceiling heights and user preferences. Consider whether this feature is necessary for your setup.
6. Multi-Functionality: Some pull-up bars are designed to support additional exercises such as suspension training or resistance bands. If you’re looking to expand your workout routine, look for bars with attachment points or loops for added versatility.
Step-by-Step Installation Guide
Installing a ceiling-mounted pull-up bar correctly is vital for safety and to make the most of your new fitness equipment. Here is a step-by-step guide to help you through the installation process:
Step 1: Gather Necessary Tools and Materials
Before you start, make sure you have all required tools and materials on hand. These typically include:
- Drill and drill bits
- Stud finder
- Measuring tape
- Level
- Socket wrench or screwdriver
- Mounting hardware (included with the pull-up bar)
Step 2: Identify the Mounting Location
Choose a location with sufficient space around it to perform pull-ups safely. Use a stud finder to locate ceiling joists, as mounting directly into a joist provides the necessary support and stability. Mark the positions of the joists with a pencil.
Step 3: Measure and Mark
Use a measuring tape to determine the correct placement height and width for the pull-up bar. Mark the screw hole positions on the ceiling, ensuring they align with the ceiling joists. Use a level to check your markings to ensure the pull-up bar will be even.
Step 4: Drill Pilot Holes
Drill pilot holes at the marked locations. This makes it easier to insert the screws and prevents the wood from splitting. Ensure you use a drill bit slightly smaller than the screws provided with your pull-up bar.
Step 5: Attach Mounting Brackets
Align the mounting brackets of the pull-up bar with the pilot holes. Insert the screws through the brackets and into the ceiling joists. Use a socket wrench or screwdriver to tighten the screws securely. Double-check that the brackets are level before fully tightening.
Step 6: Install the Pull-Up Bar
Once the mounting brackets are firmly attached, position the pull-up bar according to the manufacturer’s instructions. Attach the bar to the brackets using the provided bolts or screws. Ensure all connections are tight and secure.
Step 7: Test the Installation
Carefully test the stability of the pull-up bar by applying light pressure. Gradually increase the force until you feel confident the bar is securely mounted. Perform a pull-up to ensure there is no movement or looseness in the structure.
Step 8: Perform Regular Maintenance
Regularly check the pull-up bar and mounting hardware for signs of wear or loosening. Retighten any bolts or screws as necessary and replace any worn-out parts to maintain safety and performance.
By carefully selecting a ceiling-mounted pull-up bar with the right features and following the installation steps properly, you can enjoy a safe and effective workout solution in the comfort of your own home.
In conclusion, ceiling-mounted pull-up bars offer a robust solution for those seeking an effective and space-efficient way to enhance their upper body strength. These versatile pieces of equipment allow for a wide range of exercises that target various muscle groups, ensuring a comprehensive workout. Additionally, their ceiling-mounted design saves valuable floor space, making them an ideal choice for home gyms with limited room.
When selecting the right ceiling-mounted pull-up bar, it is essential to consider key features such as weight capacity, grip options, and build quality to ensure safety and effectiveness. Following a meticulous installation guide is crucial to securely mounting the bar, guaranteeing stable and optimal performance for years to come.
Investing in a ceiling-mounted pull-up bar not only elevates your workout routine but also utilizes your living space efficiently. By incorporating this equipment into your home gym setup, you are well on your way to achieving your fitness goals and maintaining a stronger, healthier body.