Beyond the Floor – A Vision of Elevated Training
Imagine transforming the classic push-up from a foundational move into a tool for unparalleled muscle development, joint health, and athletic performance. The key to this evolution isn’t a complex machine, but a simple, versatile piece of equipment: the fitness bar. Mastering push-ups with a fitness bar is not just possible; it’s the strategic upgrade that unlocks superior form, targets new muscle fibers, and propels your home training to an expert level.
Foundational Choices: Selecting Your Push-Up Bar “Hardware”
Your choice of bar forms the literal foundation of every rep. The right selection ensures safety, effectiveness, and long-term progression. This is your first and most critical control variable.
Part A: Type and Design Selection
Not all fitness bars are created equal. Your primary decision points are:
- Fixed vs. Rotating Handles: Fixed handles offer maximum stability, ideal for building raw pressing strength. Rotating handles allow your wrists and forearms to find a natural position during the movement, significantly reducing joint stress and improving comfort for high-rep sets.
- Ergonomic Grip Angles: Parallel grips are standard and excellent for general use. Bars with a slight inward angle (often called “knurled” or “ergo”) can promote a more natural shoulder external rotation, enhancing chest activation and further protecting the shoulder joint.
Part B: Setup and Stability
Precision in placement is non-negotiable. An unstable setup compromises every benefit.
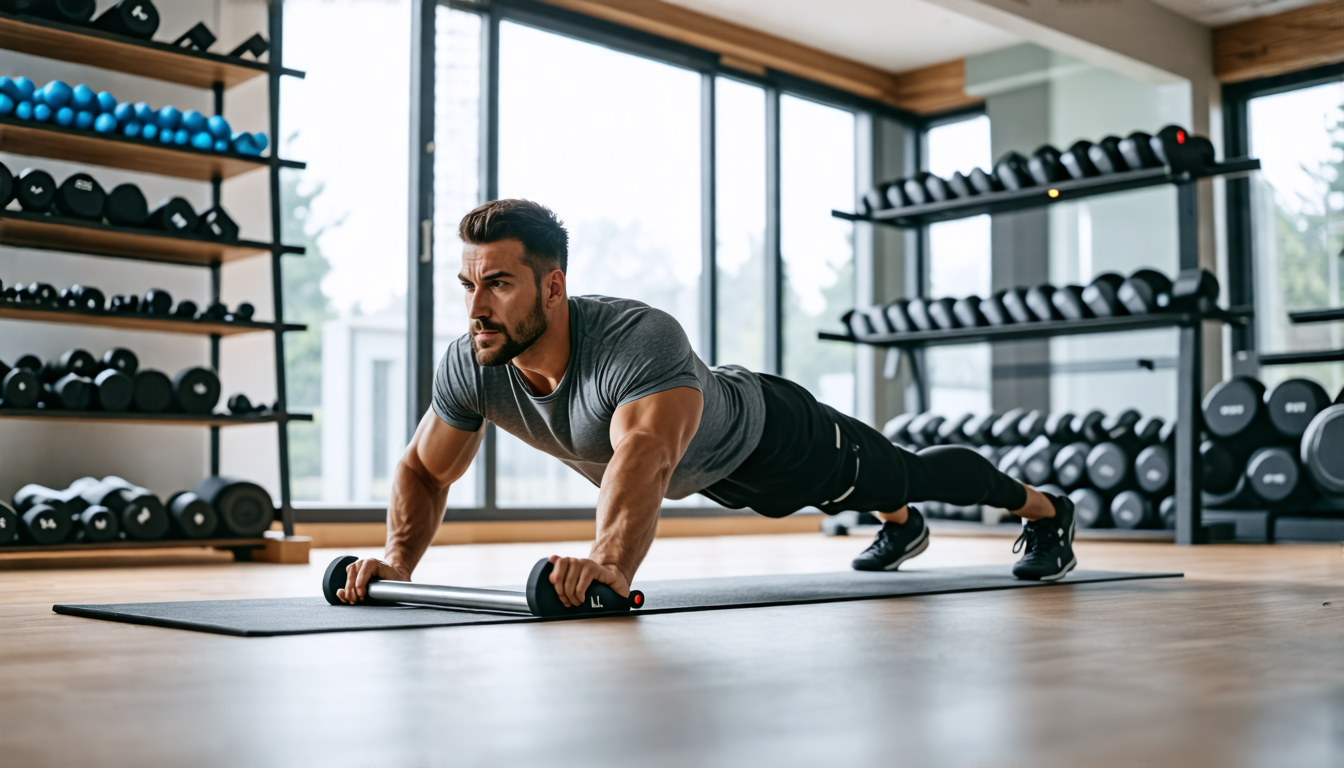
- Critical Placement: Always deploy the bars on a completely flat, non-slip surface. For hardwood or tile, use a yoga mat underneath. The bars must not rock, shift, or “walk” during your set.
- Body Alignment Check: Position the bars directly under or slightly wider than your shoulders. A simple test: get into a plank position with hands on the bars; your wrists, elbows, and shoulders should stack comfortably without feeling cramped or overextended.
Part C: Material and Build Quality
The construction of your bar dictates its durability, feel, and safety margin. Choose based on your training intensity and long-term goals.
| Component Category | Common Options | Key Characteristics |
|---|---|---|
| Frame Material | Steel, Aluminum, Plastic-Composite |
Steel: Durable and supremely stable; the gold standard for heavy loading. Can be heavier. Aluminum: Lightweight and corrosion-resistant; excellent for portability. Check weight ratings. Plastic-Composite: Light and affordable; best for beginners or very light use. Lacks the solid feel of metal. |
| Grip Type | Knurled, Rubber-Coated, PVC Foam |
Knurled: Provides aggressive, non-slip traction; preferred for serious strength training. Can be rough on skin. Rubber-Coated: Offers comfortable, secure grip with good sweat absorption. Most common and user-friendly. PVC Foam: Very soft and comfortable; ideal if you have hand or joint sensitivities. Less durable over time. |
| Base Design | Wide Flat Base, Suction Cups, Triangular |
Wide Flat Base: Maximizes ground contact for stability on even surfaces. The most reliable design. Suction Cups: Can enhance grip on smooth surfaces like tile, but are not a substitute for proper placement on a mat. Triangular/Arched: Allows for a slightly different hand position but can be less stable if not perfectly engineered. |
The Core System: Mechanics and Muscle Mastery
Using a fitness bar transforms the push-up from a static exercise into a dynamic, controllable system for growth. You are no longer at the mercy of the floor; you command three key variables.
Variable 1: Range of Motion – The Depth Advantage
The Target: Achieve a deep, chest-below-elbows position to stimulate maximum muscle fiber recruitment in the pectorals and shoulders.
Consequence of Error: Limited ROM equals limited growth. Stopping short leaves the most potent part of the stretch and contraction untapped.
The Control Method: The bars create physical space for your chest to descend past your hands. This allows for a fuller, safer stretch at the bottom position, directly translating to greater strength and muscle development through a complete range.
Variable 2: Joint Alignment and Wrist Health
The Target: A neutral, pain-free wrist and optimal, externally rotated shoulder positioning.
Consequence of Error: Wrist hyperextension leads to chronic strain. Internally rotated shoulders (elbows flared) promote impingement and rotator cuff stress.
The Control Method: Gripping a bar places the wrist in a neutral, handshake position, eliminating the extreme extension of a flat-hand push-up. This alignment naturally encourages you to “screw” your hands into the bar, promoting shoulder external rotation and a safer, more powerful pressing path.
Variable 3: Muscle Emphasis and Activation
The Target: Precisely shift focus from the chest to the triceps or anterior deltoids.
Consequence of Error: Plateauing in strength and developing muscular imbalances.
The Control Method: The elevated grip allows you to strategically alter your body angle. For more triceps, bring your hands closer together and keep your elbows tight to your ribs. For more shoulders, perform a “pike push-up” by walking your feet in and hips up. The bar provides the stable platform needed for these precise adjustments.
Advanced Practices: The Push-Up Bar Progression Framework
With the system mastered, you cultivate strength through strategic progressions. This is where the fitness bar transitions from an aid to a true catalyst for expertise.
Preparation: The Foundational Grip
Before loading intensity, master the false grip (thumbless grip). Wrap your fingers over the bar, keeping your thumb on the same side as your fingers. This builds immense wrist and forearm stability and is a foundational skill for advanced calisthenics like muscle-ups.
Ongoing Inputs: Programming for Growth
Integrate bar push-ups deliberately. Use them as your primary pressing movement on upper-body or push days, or as a strength component in full-body routines. Leverage the bar’s stability to implement advanced techniques: 4-second lowering (eccentric) phases, 2-second pauses at the bottom, or explosive concentric phases for power development.
Selection and Strategy: The Progression Ladder
The bars provide a clear, scalable path. Follow this sequence to build mastery:
- Incline Bar Push-Up: Bars on an elevated surface (bench, chair). Focus on perfect form and full ROM.
- Standard Bar Push-Up: Master 3 sets of 15-20 perfect reps on the floor.
- Feet-Elevated Bar Push-Up: Place feet on a bench or box. This shifts load to the upper chest and shoulders.
- Archer Bar Push-Ups: Use a wide grip and shift your body side-to-side, loading one arm significantly more than the other. This is the direct precursor to one-arm work.
Can I do push-ups with a fitness bar for advanced moves? Absolutely. This setup is the essential gateway. Archer push-ups build the unilateral strength and core stability required for one-arm progressions. The secure, elevated grip is also ideal for explosive plyometric push-ups, allowing for greater height and a safer landing compared to the floor.
Threat Management: Preventing Form Breakdown and Injury
Adopt a proactive stance. Your first defense is always prevention, with clear interventions for when form falters.
Prevention: The Pillars of Safety
- Mandatory Warm-up: Never grip a cold bar. Perform 2-3 minutes of dynamic wrist circles, cat-cow stretches, and scapular push-ups (without the bars) to prepare the joints.
- Equipment Inspection: Before every session, check the bars for any loose parts, cracks, or worn grips. Ensure the base pads are clean and dry.
Intervention: Correcting Common Faults
- Problem: Elbows Flaring Excessively.
Solution: Actively practice the “screw-drive” cue: as you grip the bar, try to rotate your hands outward (as if trying to twist the bars apart). This automatically tucks your elbows to a 45-degree angle. - Problem: Sagging Hips or Arched Lower Back.
Solution: Before you descend, brace your core and glutes as if bracing for a punch. Maintain this full-body tension throughout the entire rep. Imagine your body as a rigid plank rotating around the bars.
Your 4-Week Bar Push-Up Integration Calendar
This phased roadmap systematically builds competency, strength, and advanced skill application. Perform this routine 2-3 times per week.
| Week & Phase | Primary Tasks | Focus Goal |
|---|---|---|
| Week 1-2: Adaptation & Neuromuscular Connection | Practice false grip holds (30 sec). Perform 3 sets of incline or standard bar push-ups, stopping 2 reps short of failure. Focus on a 3-second descent. | Ingrain perfect wrist/shoulder alignment and achieve a deep, pain-free range of motion. Master control. |
| Week 3-4: Intensification & Load Mastery | Begin all sets with standard bar push-ups. Introduce one “intensifier” per workout: a set with a 2-second pause at the bottom, or a set of feet-elevated push-ups. Aim for 3-4 working sets. | Increase time under tension and practice managing a greater load on the primary movers. Solidify full-body tension. |
| Week 5+: Skill Acquisition & Progression | Use your first working set for skill practice: 3-5 slow Archer Push-Up reps per side. Follow with 2-3 heavy sets of your most challenging variation (e.g., weighted feet-elevated). | Develop unilateral strength and control. Apply the principles of progressive overload to continue building muscle and strength. |
From Floor to Foundation
The journey from a standard floor push-up to mastering the fitness bar is a journey from participant to engineer. You move from performing a movement to controlling its core variables—depth, alignment, and emphasis. This mastery delivers more than just a stronger chest; it builds resilient joints, precise muscle control, and a versatile strength that translates across all physical pursuits. The fitness bar transforms the humble push-up into the foundational movement of a sophisticated home training arsenal, offering a path of limitless progression free from the constraints of pain and plateaus. This is the true mark of an expert: not just working harder, but training smarter with every single rep.


